Support Center
PG66 User Manual
User Manual
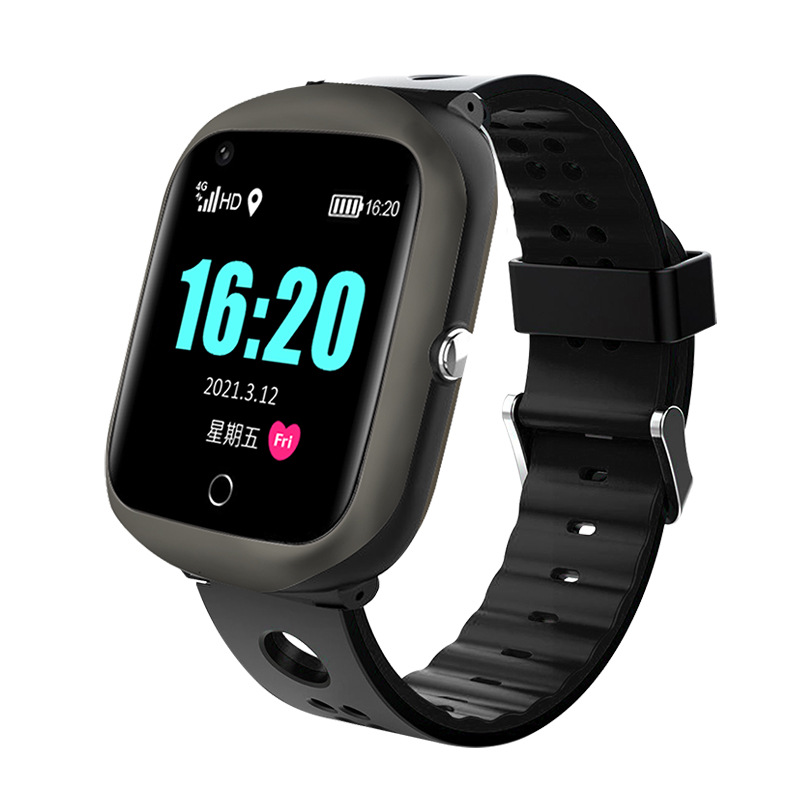
Please read the instruction manual carefully before use for correct installation and quick use. Please refer to the actual product for the color of the product!
Before use
DO NOT turn the watch on until the SIM card has been installed correctly.
Make sure the device is fully charged before first use.
The ID number and Reg code are on the bottom of the external box.
Please note that this product does require an active mobile SIM with text call and data
1) SIM card installation method:

After operating in the order of the above 4 pictures, you can turn on the phone. If you see the signal grid of the SIM card on the status bar of the watch, it means that you have successfully installed the SIM. If you can see the up and down arrows and 4G on the leftmost side of the signal grid, It means that your card is online normally. The screws can be screwed on at this time to prevent water from entering.
2) Simple usage
1. Download and install the App “Aibeile Plus”
(Option1) – Scan the following QR code, download and install the App
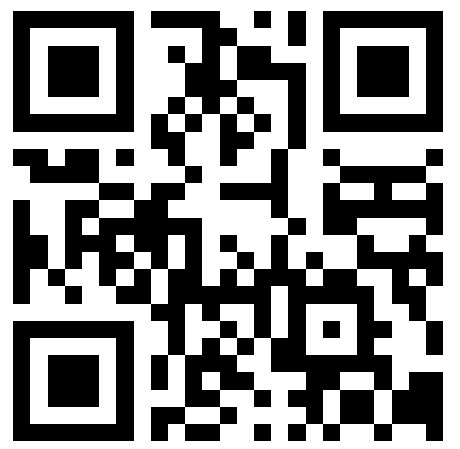
(Option 2) – Search “Aibeile Plus” in App Store – Apple or Google Play

(Option 3) – Scan the QR code in the GPS watch in ‘More’ – QR code – App download
Note: During installation, the phone prompts whether to trust the APP or whether to allow prompt access to phone location, etc. Please select trusted and allowed all the time.
3) Registering the Watch and log in:
Open the App, new users will need to register a new account by clicking on the right bottom “Register” button, complete the registration steps. The account email address please use a short email address .Please note that you will need to select the right area you are located in; for example, if you’re in Europe, you need to choose “Area” as Europe. If you’re in Australia, you need to choose “Area” as “Asia and Oceania”. You also need to input a correct email address to ensure you can reset your password if required.

Bind your device : Newly registered account after login, you will be prompted to bind the device, otherwise, you cannot enter the main interface of the app.

This registration code(QR code) is on the box, or watch menu “More” – QR code.
When the device is successfully bound, you can start the device function. If you want the APP to bind another device, please see section 4. otherwise, you can skip it.
Note:
①The Registration QR code is the 15-digit registration number found on the QR code on the box, it is not the IMEI barcode number.
②When the registration is on the Apple mobile phone; there is no successful registration interface, only the message of “registration successful” is prompted.
4) Bind another device:
After login to the account, select ‘More’ ->Device list -> Add device, Enter or scan the QR code to bind another device.


5) How to Use the Watch:
1) Power on: hold the power button for 3 seconds to start the Watch.
2) How to power off:
(Option 1) Click the watch ‘More’ / ‘Setting’ / ‘Poweroff’ / ‘OK’.
(Option 2) by APP: More / Remote Shutdown / OK.
3) Battery Charge: use the magnetic charging lead to attach to the back of the device (it will only connect one way), connect the other end of the cable to the supplied USB charger 5V2A, or other sources with 5V2.1A/2.4A output.
4) It is highly recommended to use USB charger with 5V output for mobile phones from worldwide well-known brands, a low quality or unknown brand USB charger may harm the GPS watch.
5) Please don’t use 5V1A and 5V500mA USB charger.
6) Watch Parameters:

7) Product Features:
1.Real-time GPS, WIFI & LBS location
2.Historical track, Geofence
3.Calling (Contacts, SOS call button, two-way communication)
4.Voice Chat message
5.Camera function
6.Health pedometer
7.Alarm clock
8.Disabled in class (Children’s watch)
9.Class Schedule (Children’s watch)
10.Reject calls from strangers
11.Prohibit dial keypad
12.Other settings and functions
8) Function Description:
1. Real-time GPS, WIFI & LBS location
Click Locate on the main interface menu bar,You can manually obtain the current device location.
Location Update Schedule Modes:
There are three location update modes. User can switch the working mode via mobile phone APP, Click‘More’-> Set up‘Location Update Schedule’.
(1) Normal mode: Updates location data to APP every 10 minutes when there is continuous movement. It is the default mode.
(2)Power saving mode: Updates location data to APP every hour when there is a continuous movement.
(3)Sleep Mode: Geo-fence (safe zone) and location updates are both invalid. this mode is the best way to save battery.
Note:
① Under the above three modes, User can double-check the device’s update location in real-time by APP. Open the APP in the map interface, click on the locate button, and the GPS tracker will report the up-to-date position as soon as possible.
② On the map, you can see the type of positioning in different colors, WIFI positioning is orange, GPS positioning is blue, LBS positioning is purple
③ In the 10 minutes or 1-hour movement tracking mode, the GPS tracker will regularly update the location on the APP Map page and History
④ The device supports GPS tracking (Outdoor), WIFI tracking (Outdoor and indoor), LBS tracking (Outdoor and indoor). The primary difference between GPS and Wi-Fi locating technologies are methods of gathering location data. GPS uses satellites that orbit around the Earth to triangulate a user’s location, whereas Wi-Fi locating technology uses relative network signal strength gathered at network access points. GPS tracking is available in out-door but mostly not available for indoor. When the GPS tracker doesn’t find GPS signal, it will use Wi-Fi or LBS tracking, Wi-Fi tracking is better for indoor comparing with LBS tracking.
2. Historical Location Playback and Geo-fence (safe zone)
In the main page of the APP, click the history button at the bottom, you can check the location history playback within the last three months.
This feature defines a Geo-fence (safe zone) perimeter and sends the user a push notification if the tracker has left or entered the safe zone. The user can still manually locate the tracker when the safe zone is turned on/off. Click ‘More’->‘Geo-fence’-> click the “+” icon in the bottom -> input the zone name -> Click and drag the map to set the centre point Click on the “+” “-” icon or slide Horizontal line to Change the range of the circle radius of the Geo-fence -> Click the “save” button at the bottom.
Note:
(1) App will show leave geofence alarm information (History alarm information can be viewed in APP Information Centre, which is in the upper left corner of the map interface).
(2) The APP may not notify user immediately of a geofence breach – it will only check as often as the time interval is set, the GPS positioning time interval is shorter, the alarm information will be sent faster.
(3) User can set up to three Geo-fences.
3. Calling:
(1) Contact:
① Add a contact : Click APP More -> Set up -> Phone Book -> Add New Number -> input name, number (can be set up to 15numbers), and finally click save.
② Edit Contact: Click APP More -> Set up -> Phone Book -> Find the number you want to edit -> Click the three-dot ico -> Edit contact -> save.
③ Delete Contact: Click APP More -> Set up -> Phone Book -> Find the number you want to edit -> Click the three-dot icon -> Delete (delete information will be synchronized in both of watches and app).
(2) SOS Numbers
Click APP More -> Set up -> SOS/family number – enter SOS phone numbers, click save.
(3) Call
① Use phonebook to call: Click the contact icon in the GPS watch to view the contact list, slide up and down to select a contact to Call.
② One-Button SOS: in case of emergency, press the power button for 3 seconds to trigger the emergency call SOS. At this time, the GPS watch will call the 3 preset emergency numbers circularly.
③ Call dialing: Click the dial icon in GPS watch, enter phone numbers manually, the telephone dial-out. APP More -> Set up -> Switch settings -> Uncheck Dialing function -> save,It can lock the dialing function,Means that the watch can only call the phone number in the phone book.
Note: Do not input special characters in phonebook, such as “-“, “()” etc.
4. Voice Chat message:
① From APP send to GPS watch: Click the Voice icon in the lower-left corner of the main page, voice or short text messages can be sent to the Watch.
② From Watch send to APP: Click WeChat in Watch, holding to talk button to speak – release your finger to complete the recording.
Note: Watch can receive a short text message sent by APP, but cannot send a text message from the Watch (only voice).
5. Camera function:
(1) Taking pictures remotely: APP More -> Remote camera -> click Photograph to start.
(2) GPS Watch to take pictures: Click “camera” in GPS watch to enter the camera interface, click on the icon in the middle of the camera to take pictures. APP More Album, you can view,delete pictures,Upload to app.
6. Health steps
Pedometer feature set: APP More -> Healthy steps Click one of the menus to edit Set pedometer period of time (up to three),step, Weight, and turn on the switch. Exercise/Sports is the same setting.
Blood pressure/Heart rate(Elderly Watch): Click “Remote measurement” can Measure the wrist temperature.
7. Alert clock
APP More -> Set up -> Alarm Clock,The alarm frequency can be set once, every day, day of the week.
8. Disabled in class (Children’s watch)
You can set 4 groups of Do Not Disturb time periods. During the set time period, it is not allowed to call in。APP click More -> Set up -> Disabled in class.
9. Class Schedule (Children’s watch)
APP More -> Set up -> Schedule,Enter the class schedule interface, you can view and edit the class schedule from Monday to Friday. Click any number in the first column of the table (it can be understood as the table row number), and the class time Prompt box will pop up. Click it to enter to view and edit the daily class time period; click any table content to view, Edit each lesson. After editing, it will be synchronized to the watch.
The menu in the GPS watch: More -> Schedule.
10. Reject calls from strangers
APP More -> Set up -> Block unknown phone calls -> Turn on blocked unknow phone calls,then only the phonebook/sos numbers can call into the watch.
(Restrict incoming calls)
11. Prohibit dial keypad
APP More -> Set up -> Switch settings -> Dialing function,then the watch can only make outgoing calls through the phonebook/sos number.
(Restrict outgoing calls)
12.Other settings and functions
This watch also has many other functions, such as Stopwatch、Calculator、Screen lock、time switch、Time zone setting etc, users can operate and use through the device or mobile phone APP.
9 ) How to Set Geofence/safety zone
To create a geofence or safety zone use the app ‘Geofence’ setting: Electronic fence. Tap on the “+” in the upper right corner, then move the map to set the circular area (you can set the radius of the circular area by the slide bar), name your geofence(e.g. home, school) and tap save.

Emergency SOS
In case of emergency, press the SOS Button (power button) for 3 seconds to trigger the emergency call SOS. The GPS watch will call the three preset emergency numbers in a loop, twice. If the two times are not answered, the loop will be terminated, and the call will not be continued. Open APP More Set up SOS/family number, Enter SOS phone numbers, tap save. Do not input special characters in the phonebook, such as “-“, “()” etc.

Call & Message
The Watch can receive a short text message sent by APP, but cannot send a text message from Watch (only audio messages).
1. Send message App to Watch: Tap on the “Chat/voice” icon (bottom left on the main screen). Voice and short text messages can be sent.
2. Send message from Watch to App: Tap on the microphone icon on the Watch or select WeChat – holding down the talk button to speak – release your finger to complete the recording.
3. Call dialing: Tap on the phone icon in the GPS watch, enter phone numbers manually, the telephone dial-out.
Location Update
Your GPS Watch will update its location based on the set location update schedule. This interval will directly impact the battery life of your Watch. APP More -> Set up -> Location update schedule.
Normal mode: Updates location data to APP every 10 minutes when there is continuous movement.
Power saving mode: Updates location data to APP every hour when there is continuous movement.
Sleep Mode: Location will not automatically update. The user will need to request a location with the “Locate” button manually. In this mode, Geo-fence (safe zone) will not work. This mode is the best way to save battery.
To locate Watch, tap on the ‘locate’ button, and the GPS tracker will update its position as soon as possible.
10) APN settings
The APN is what will allow the Watch to connect to your SIMs mobile service data network. The Watch needs this data to connect to your App. If the APN is not set, the Watch can still call, receive calls, send and receive SMS, but the APP will show the device’s status as “Offline”.
Ask your carrier about APN information,and set it in the GPS watch. Or you can check your SIM card APN information by installing SIM card in a mobile phone, check APN in the network profile page in settings of mobile phone.
setup APN by SMS Command :
pw,123456,apn,apnname,username,password,MCCMNC#.
For example: If the BSNL SIM card, the APN name is bsnlnet, user name null, password null, MCC=404, MNC=80 then you can send this SMS to GPS watch:
pw,123456,apn,bsnlnet,,,40480#
Use your mobile phone; send the above SMS command to the GPS watch SIM card. After you send the SMS command, please check if you get a setup success replied SMS from GPS watch. If you need to make a call, it is recommended not to use M2M SIM card. Please also make sure that the SIM card data package is available and has not expired. (Note: If the user name and password is null, you still need to keep the comma symbol as above) APN will set successfully after you get the reply SMS from the GPS locator; you are suggested to reboot GPS watch after APN settings. Note: Each operator’s APN information is different; please check the operator website for their APN and MCC, MNC information. You can insert the sim card into your Android phone, and find APN from the network profile.
11) Adding a secondary administrator account:
The first account that registered the GPS Watch is the primary administrator account. You can share the GPS watch with a secondary account if you wish to have other users monitor and interact with the watch. When the secondary account tries to add the same GPS watch, the primary administrator will receive the authorization notification. The primary administrator is required to authorize access to any new account.
Note: One APP account can bind multiple GPS trackers, while one GPS tracker can also be connected with multiple secondary accounts with authorization from the primary administrator.
The screen below will is the primary administrator notification, after the secondary administrator has scanned the same watch QR code into their App.

Authorization interface

Login screen

Main page with map, click “More”

More page

Set up page
12) Delete a GPS watch from the APP account
‘More’-> Device list -> Edit in the upper right cornert -> find the device you want to unbundt -> Unbundledt -> OK.


Declaration:
• If you are removing or tampering with the product casing, the product will void the warranty.
• The manufacturer shall not be liable for the illegal use of the product.
• By using this GPS tracker, you acknowledge that you accept the following precautions terms. If you do not understand or accept any of the precaution terms herein, you should discontinue your use of this GPS Tracker.
Troubleshoot & tips
My device is showing “offline” on app
There may be a number of reasons your Watch is not appearing online on your App; we suggest you check the below points:
1. Check if the Watch is on and charged.
2. Is the SIM card installed correctly and detected?
3. Is SIM active with data and credit?
4. Ensure that the APN is set correctly.
Watch doesn’t power on and/or charge
If the battery is completely flat, the Watch will appear not to turn on at all. Place the Watch on charge for 30 minutes using the USB cable and provided a USB outlet plug. After 30 minutes disconnect the USB cable and press and hold the power button for 20 seconds to reboot the Watch.If not charging, use an eraser or soft fabric to clean the charging metal contact points on the back of the Watch, these contact points can oxidise due to use over time.
No SIM card detected (!) on Watch
Reboot your Watch and take it outside for a quickwalk or call.
1. Turn the device off
2. Reinstall active SIM (ensure SIM is correctly inserted and not loose)
3. Turn on the device
4. REBOOT watch
Reboot Instructions: Press side button on watch -> more -> settings -> reboot
GPS tracker APN settings
The APN is what will allow the Watch to connect to your SIMs mobile service data network. The Watch needs this data to connect to your App.If the APN is not set, the Watch can still call, receive calls, send and receive SMS, but the APP will show the device’s status as “Offline”.
Set APN Instructions:
To set the APN on the watch, send the below SMS command to the watch:
pw,123456,apn,(APN NAME),,,50501#
For example: For ALDI Mobile the APN name is “mdata.net.au”. Then send
“pw,123456,APN,mdata.net.au,,,50501#”
If command is successful you should have a return SMS that will read: “Set apn,oran,,,73002 is succesful”
Common Australian APN based on network providers:
Watch Positioning Methods
The device supports GPS tracking (Outdoor), Wi-Fi tracking (Outdoor and Indoor), LBS tracking (Outdoor and Indoor). GPS uses satellites that orbit around the Earth to triangulate the user’s location, whereas Wi-Fi locating technology uses relative network signal strength gathered at network access points. GPS tracking is available indoors but not recommended, as the location is prone to bouncing. When the GPS watch doesn’t find a GPS signal, it will use Wi-Fi or LBS tracking. Wi-Fi tracking is better for indoor comparing with LBS tracking. Positioning accuracy
GPS/AGPS: 5-15m WIFI:15-100mLBS:100-1000m
Reasons for inaccuracy:
1. If GPS tracker is indoors, it will now have a clear line of sight with at least three GPS satellites.
2. The environment around GPS tracker plays a big part in its accuracy. Any environmental obstructions such as mountains, tin roofs, buildings, or even heavy tree cover can skew the satellite’s connection.
3. Ensure you have set your GPS positioning interval to 1 minute, 10 minutes OR 1 hour.
NOTE: In order to save battery power, if the tracker is not moving, it will not upload data positioning to the APP. You can use the ‘Locate’ button in the App to request a live location position to be sent to the App.
Watch shows a different time than app
You can use the app to adjust the time zone in the app settings .
More, Settings, date and time – if it’s set to automatic, untick automatic date and time”, then manually set time and date.
Using the watch overseas
Your Watch can be used overseas. You will need to ensure your SIM card has global roaming or use a country local SIM. You will need to update the APN settings to access the local countries SIM network.
Precautions
1.Do not immerse the product in liquid or chemicals such as saltwater and detergents.
2.Do not wear this product in the shower, to prevent the different PH range of shower gel, shampoo, conditioner, or hot water from damaging the GPS tracker.
3.Keep the product away from fire, heat, and other extreme high-temperature environments;
4.Keep out of children’s mouths;
5. Use only 5V chargers or USB ports; higher voltage may damage the device;
6. Do not directly attach the magnetic charging lead to any metal or conductive objects except the GPS Tracker; otherwise, it may cause the charging head to short circuit.
7. In the case of excessive heating of the battery during charging, immediately disconnect it from the power supply.
8. Before first use, fully charge the battery.
9. If the Watch heats up when wearing it, immediately take it and turn the Watch off either via the watch settings or in the App.
10. Never connect to a mechanically damaged charger or if the batteries are swollen. Do not use batteries in this condition due to the risk of explosion.
11. When this product is in a de-energized state and outside the service area, location function does not work.
